
Page Contents :
Introduction of Eclipse IDE for Windows
Are you a Microsoft Windows user stepping into the world of software development?
If you’re passionate about mastering the art of coding, you’ve likely come across Eclipse Integrated Development Environment ![]() , commonly known as Eclipse IDE.
, commonly known as Eclipse IDE.
In this blog post, we’ll introduce you to the Eclipse IDE for Windows and delve into why it’s the compelling choice for developers worldwide.
Eclipse IDE is a powerful open-source software development platform available to all. It provides a highly adaptable and extensible framework for creating various types of applications. It’s a versatile development environment suitable for developers of all skill levels.
What makes it even more appealing is its cross-platform compatibility, extensive plugin ecosystem, and support for multiple programming languages, including Java, C++, Python, and more. Eclipse IDE has garnered the affection of developers around the globe.
Why Choose Eclipse IDE For Windows
- Cross-Platform Compatibility
One of the standout features of Eclipse IDE is its cross-platform compatibility.
It works seamlessly on Windows, macOS, and Linux. This flexibility is invaluable for developers who need to work across different platforms or collaborate with team members using various operating systems. - 2. Expansive Ecosystem:
Eclipse offers a vast and vibrant ecosystem of plugins and extensions, making it an incredibly adaptive tool.
Whether you’re developing web applications, mobile apps, or desktop software, Eclipse provides plugins tailored to meet your specific needs.
For developers working on projects with ever-evolving requirements, this adaptability is a significant advantage. - 3. Support for Multiple Languages:
Eclipse supports multiple programming languages.
Whether you’re diving deep into C/C++ programming, crafting dynamic web applications with PHP, or exploring the world of Python, Eclipse offers comprehensive support and rich features. - 4. User-Friendly Interface:
Eclipse boasts an intuitive and user-friendly interface.
Its clean design and customizable layout ensure that you can work comfortably and efficiently.
Eclipse IDE’s user-centric design allows developers to focus on writing code without being distracted by a complex or cluttered interface. - 5. Active Community and Support:
Eclipse maintains a robust and active community composed of developers, users, and contributors.
You can find answers to your questions, access tutorials, and seek support from other developers within the Eclipse community.
Additionally, the Eclipse Foundation actively maintains and updates the IDE, ensuring its relevance, security, and alignment with the latest technological trends. - 6. Free and Open Source:
Eclipse IDE is open source, making it entirely free to use.
This cost-effective solution is suitable for independent developers, small startups, and large enterprises.
Eclipse’s open-source nature encourages innovation and collaboration, creating a vibrant environment for elite professionals in the software development field.
By choosing Eclipse, you not only save on costs but also become part of a global community dedicated to advancing software development.
Installation of Eclipse IDE for Windows
- Visit the Eclipse IDE website
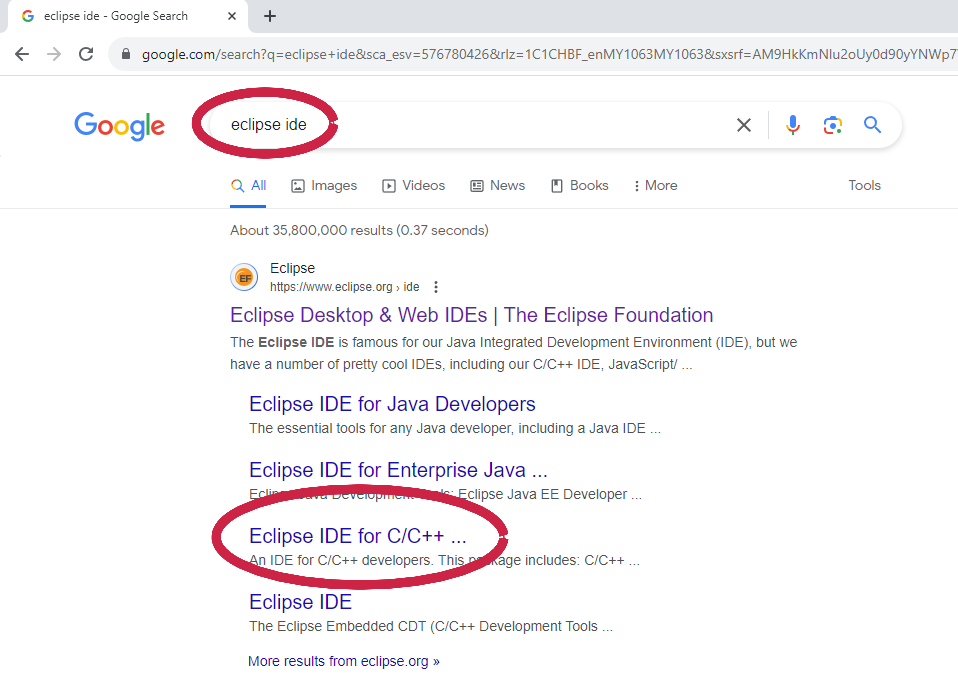
Launch your preferred web browser, such as Google Chrome, to get started.
In the search bar, type “eclipse ide” to locate the official website. Find the Official Website
From the search result, choose the “Eclipse IDE for C/C++ Developers ” link.
Download the Current Software Package:
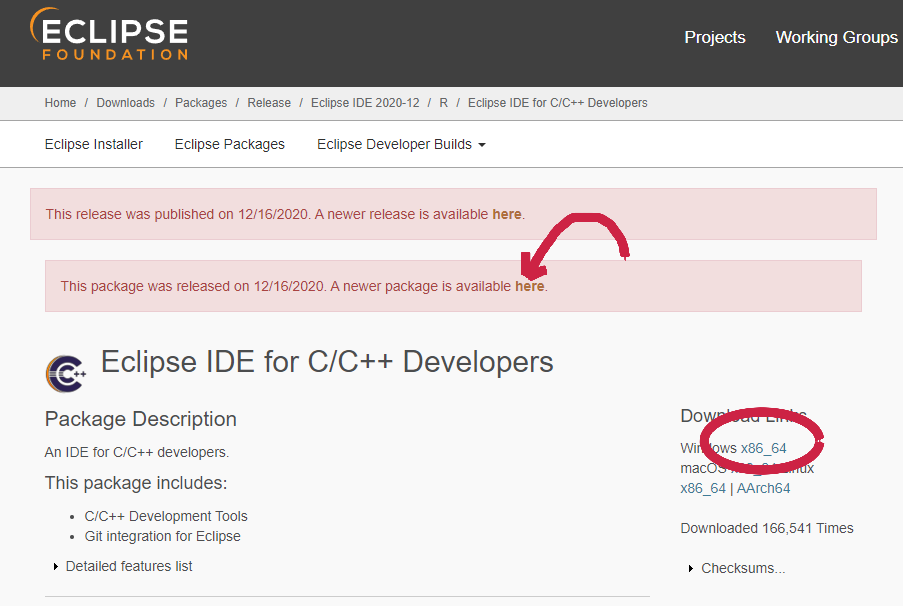
You will be directed to the Eclipse IDE for C/C++ Developers page.
Select the “Windows x86_64>” link on the left to initiate the download.Alternative downloads for Newer Software Package:
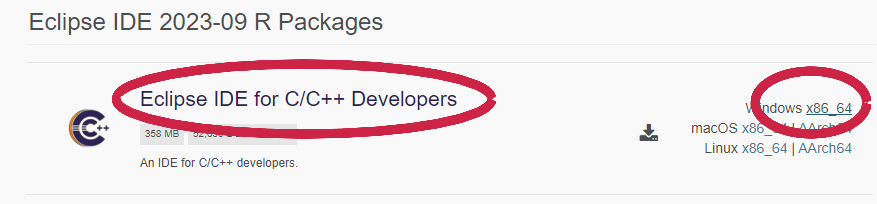
If a newer version is available for download, you can click on the link provided that appears on the page.
Scroll down to the Eclipse IDE for C/C++ Developers section.
Click the “Windows x86_64” link on the left to start downloading the file.- Unzipping the ZIP file:
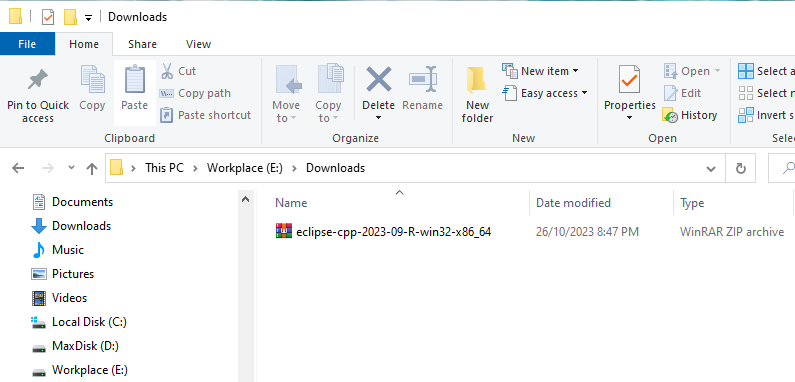
After the download is complete, open the downloaded file using Windows Explorer.
Double-click the downloaded Eclipse IDE Zip file. - Selecting the Destination Directory:
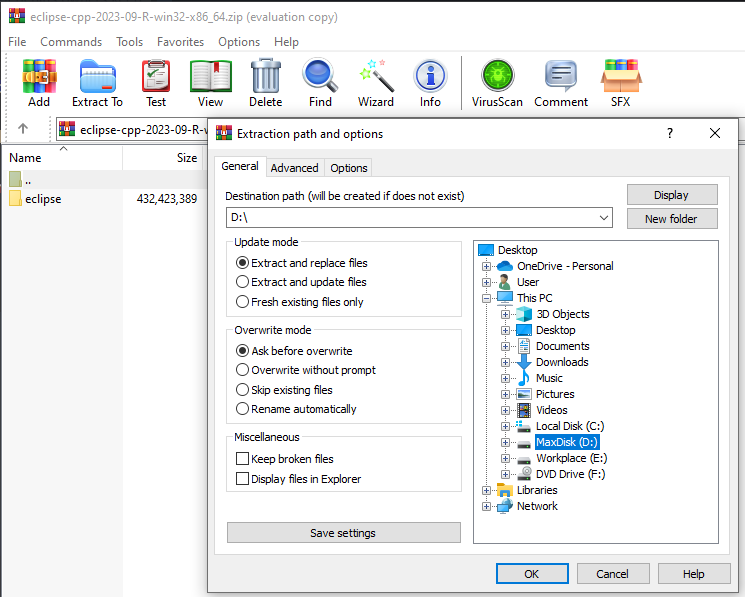
Click on the “Extract To” icon and choose the Destination path for installing Eclipse IDE.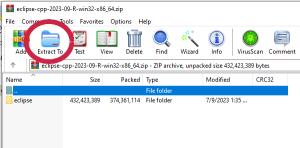
Extract the Zip file
Click “OK” to proceed. - Extracting files to the Destination Path:
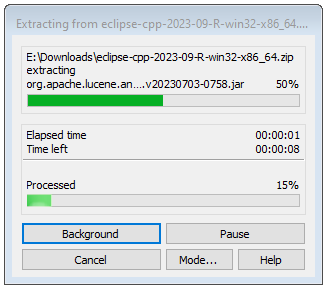
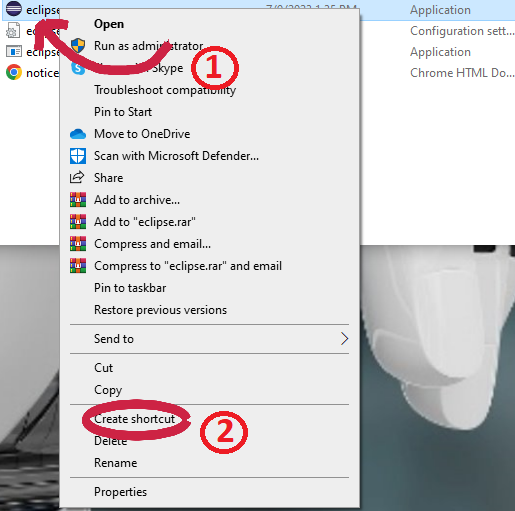
The extraction process should take less than a minute. - Creating a Shortcut:
You can create icons for Eclipse IDE on your desktop.
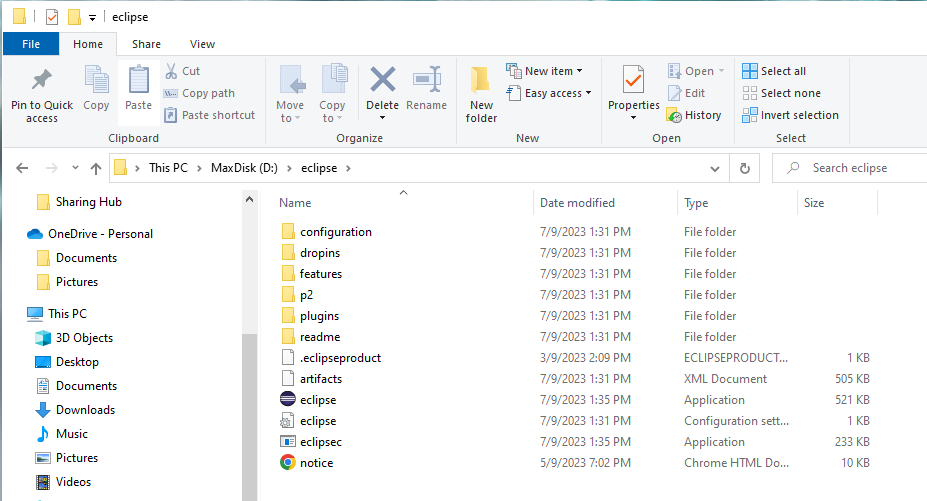
Open the Eclipse IDE folder from the Windows Explorer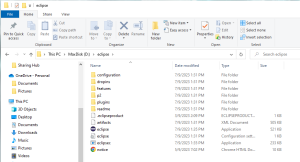
Open Eclipse directory
Right-click on “eclipse” and select “Create shortcut.”
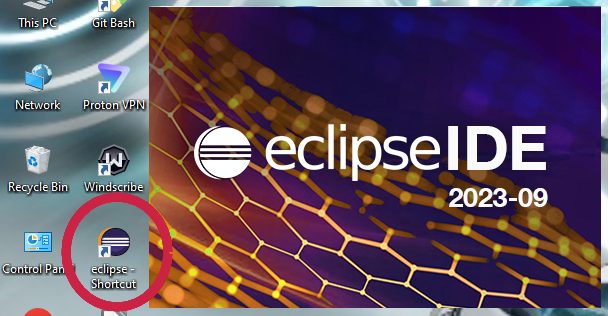
Then move the shortcut to the desktop. - Open Eclipse IDE:
Clicking on the Eclipse IDE icon on Windows to launch it. - Select Workspace Directory:
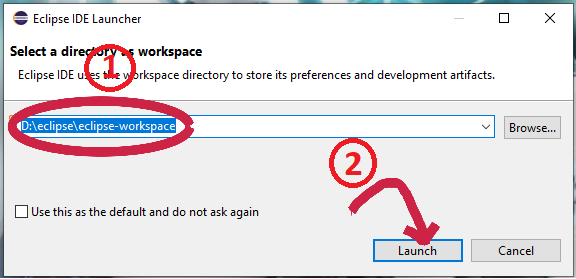
Choose a directory for the Eclipse IDE workspace directory to store its preferences and development artifacts.
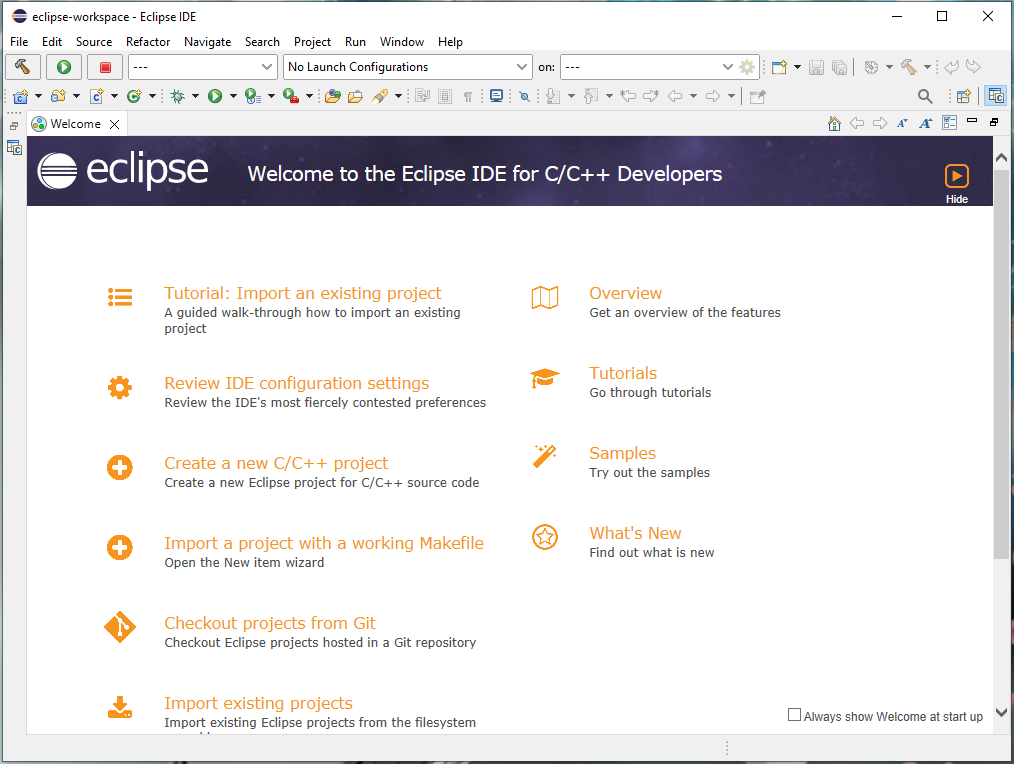
Click “Launch” to proceed. - Launch Eclipse IDE Welcome screen:
Eclipse will start launch by loading the preferences. Then a welcome screen will display. - Create a New C/C++ Project:
Let start to create a new project.
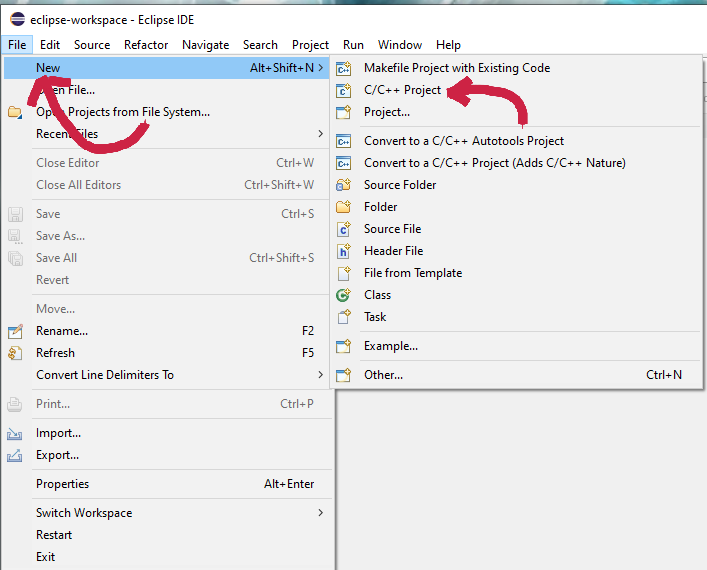
Click on “File” in the menu, then select “New” and choose “C/C++ Project“.
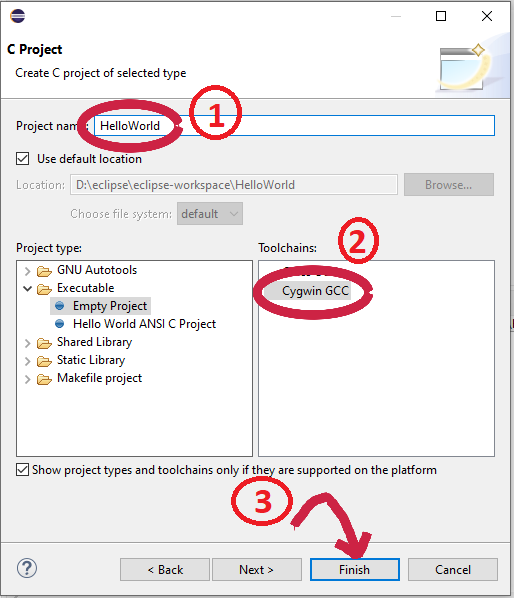
Create a new C project
Give your project a name, such as “HelloWorld.”
Select the “Cygwin GCC” as your Toolchains and click “Finish.” - Create a New C File:
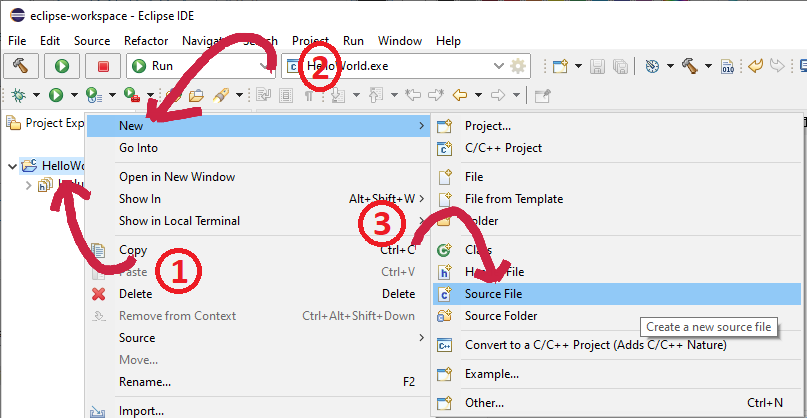
In the “Project Explorer” panel on the left, right-click on your project name “HelloWorld” and select “New” > “Source File.”
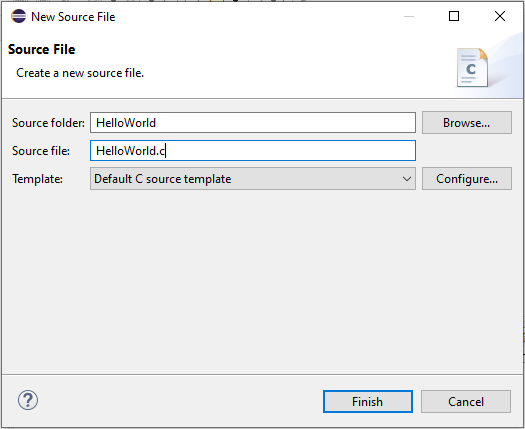
Add a source file
Name the file “HelloWorld.c” and click “Finish.” - Write Your C Code:
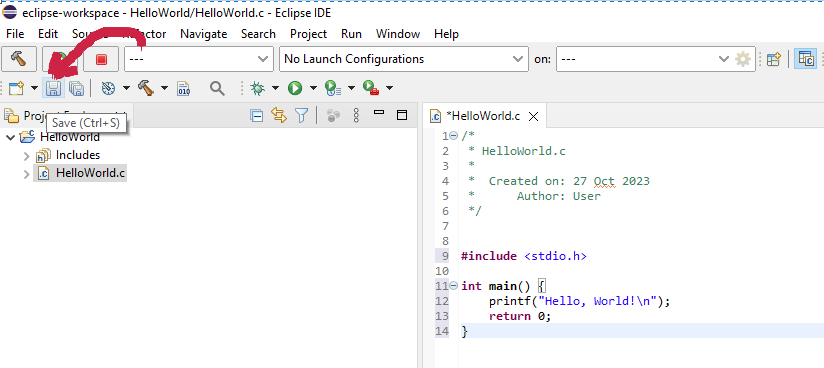
In the “HelloWorld.c” file, write your C code.
For a simple “Hello, World!” program, you can use the following code:#include <stdio.h>int main() {
printf(“Hello, World!\n”);
return 0;
} - Save the File:
Save your C file by clicking “Save” icon or pressing “Ctrl + S“. - Generate a Makefile:
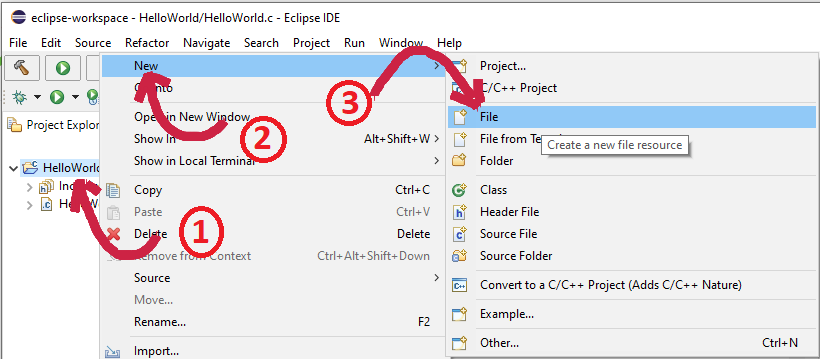
Right-click on your project name “HelloWorld” in the “Project Explorer” and select “New” > “File.”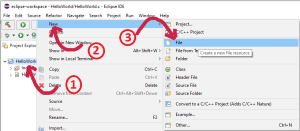
Add a Makefile file
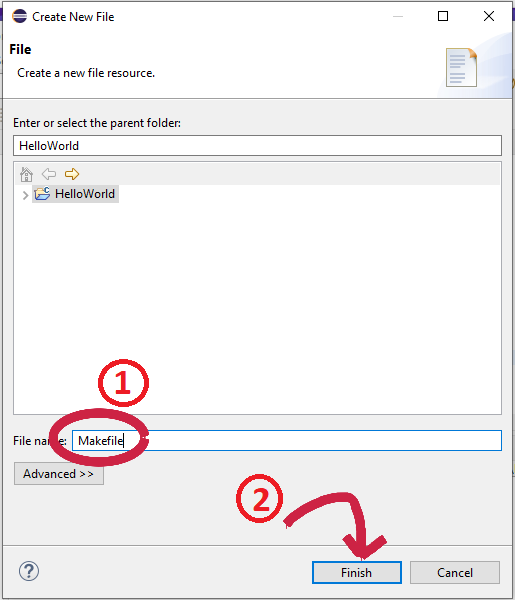
Name the file “Makefile” and click “Finish.”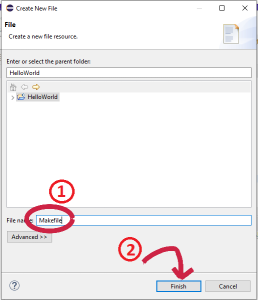
Create Makefile
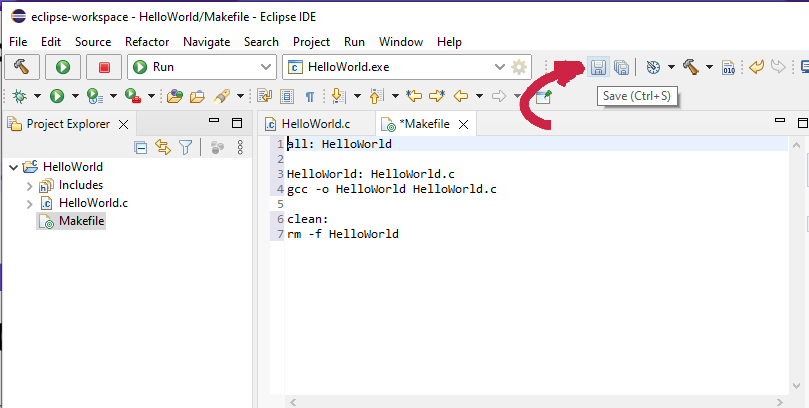
Edit the Makefile with the necessary build instructions, a basic Makefile might look like this:all: HelloWorldHelloWorld: HelloWorld.c
gcc -o HelloWorld HelloWorld.cclean:
rm -f HelloWorld - Build the Project Using Makefile:
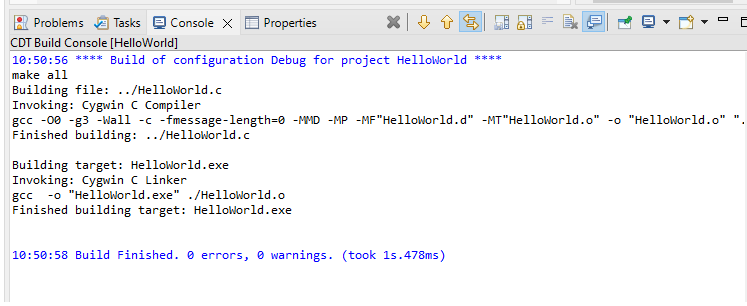
After saving the Makefile, right-click on your project name in the “Project Explorer” and select “Build Project.”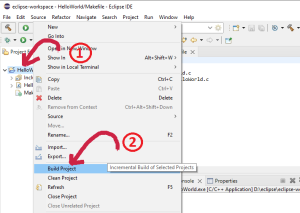
Use Makefile to build project
Eclipse will use the Makefile to compile your code. - Run the Program:
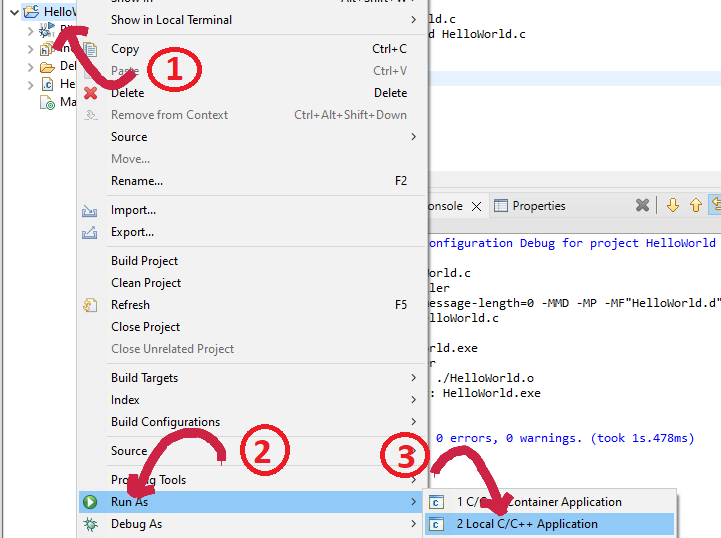
After successfully building the project, right-click on the project name in the “Project Explorer” and select “Run As” > “Local C/C++ Application.” - View the Output:
The “Hello, World!” output will be displayed in the Eclipse IDE’s Console at the bottom of the screen.


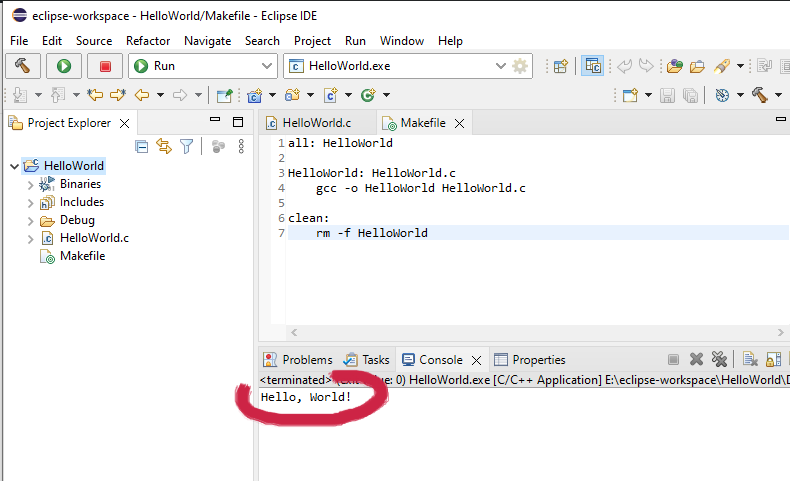
You’ve now successfully created a Makefile and used it to build your project in Eclipse IDE for C/C++.
This approach allows for more complex build configurations and customization as your projects become more advanced.